by Ellen McGlynn
With your soil all in check now and your HARD RED WINTER WHEAT BERRIES ready to go (you can order them online through our website or find them in your local health food store), there are just a few more simple rules to follow before you start growing your own wheatgrass. While these rules are pretty standard for any wheatgrass growing “how-to,” I do want to elaborate on some of the timing requirements involved in getting your wheat berries from bag to tray. If you start growing wheatgrass with any regular frequency, you’re going to find that sometimes it’s not as easy as it sounds to meet those little 8-12 hour “deadlines,” and it’s nice to know what to expect when you either CAN’T or DON’T meet them.
Guidelines for a successful crop:
1. Measure 1½ cups of wheat berries in a one-quart sprouting jar (sprouting lids are available through our website, or you can use cheesecloth under a threaded ring on a canning jar).
2. Place sprouting lid on your jar before adding water so that the berries won’t spill out as you fill the jar.
3. Fill jar almost completely with water and shake well (with hand over lid) to give those berries a good rinse. Drain, and then fill the jar again right to the top.
4. Let the wheat berries soak for 8 to 12 hours.
5. After 8 to 12 hours, drain your soaked seeds, and fill the jar again with clean water to rinse. I have a high-pressure sink attachment that allows me to really agitate those plump soaked wheat berries and irrigate them well with clean water, so if you have a good hose attachment on your sink, you may find it a real plus when it comes to rinsing seeds at this stage.
6. Drain jar of all water and set in a dark, warm location (at least room temperature) to sprout. If you’re just doing one jar, simply set your jar in a draining position in a large bowl that will keep the jar inclined. Cover the bowl with a towel or plastic sheet so that the seeds do not dry out. If using plastic, do not cover the bowl so tightly that air cannot get in.
7. After 8 -12 hours of sprouting, little white tails will begin to protrude from the berries. Sprinkle your sprouted wheat berries in an even layer on top of (NOT mixed into) approximately 1 inch of soil (roughly two quarts) in your 10” x 20” tray. (See last week's posting on soil amendments).
8. Gently water tray to give it a good initial soak, top with a humidity dome, and then set in a 70-75 degree location out of direct sunlight. If you are also able to manage your room humidity, 40 to 60 percent humidity is the acceptable range.
9. Water your wheat sprouts once daily (preferably in the morning), and you should have a full-grown 9” grass ready to harvest in nine days from the time you first put water to wheat berry.
10. Wheatgrass is most nutritious on Days 9 and 10, so harvest it all at once about 1” from the root, and store it in a bag with a small hole for “breathing” in the crisper bin of your refrigerator. One tray should produce approximately one pound of cut grass. Use as needed. Cut grass should last for one to two weeks in the refrigerator if stored properly.
Now, back to the growing. What happens if you don’t have time to soak your wheat berries, or what if you lose track of time and end up soaking your wheat berries for more than 12 hours? What if you have time to soak your wheat berries, but you don’t have time to sprout them? All good questions. I’ve been forced to “handle the consequences” myself many times and know where it’s okay to cut corners, and where it is not.

First of all, let me state that it’s entirely possible to grow wheatgrass without soaking the wheat berries at all (if you water them well, keep them misted several times a day, and covered), BUT I must make you aware that there are different microclimates even within a single tray, and because of that, not all wheat berries will sprout at exactly the same time. In particular, the ones on the edges of the tray will tend to sprout later and will be affected by cooler temperatures more than the ones in the middle, resulting in delayed or retarded growth. Likewise, not all wheat berries are created equal, and some require just a tad bit of extra soaking time to get them into the sprouting stage. Some wheat berries may not even sprout at all for any number of reasons. Unsprouted wheat berries in moist locations can cause seriously moldy conditions. So, while it is possible to throw dry wheat berrries on the soil and come up with a half-decent crop, you may ultimately not get the best looking end-product.
Next, what if you don’t have time to soak your wheat berries even for 8 hours? Soak it as for as long as you can. Anything is better than not soaking at all. Then either go directly to applying your wheat berries to a nice moist soil, or keep them in the jar for sprouting if time permits. Be forewarned, however, that you will probably have a slightly uneven crop resulting in lower crop yield or an unsightly presentation.
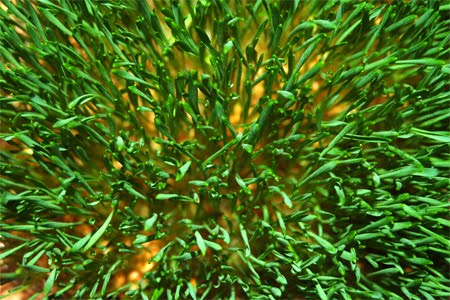
What if you oversoak your wheat berries? DANGER ZONE. Try, try, TRY not to go over the 12-hour mark. Fourteen, tops! The smell of fermentation is the first sign that you’ve oversoaked your wheat berries and are not going to have a good crop. What you’ll get is a little germination and a LOT of mold, so save yourself the time and soil right from the start and consider it a lost crop. [Below top: Top view of mold developing on oversoaked wheat berries on Day 4; Below bottom: Top view of healthy grass planted on same day].
Can you just soak but not sprout your wheat berries in the jar? Yes. And you will still get a nice crop. BUT, keep in mind those little microclimates in the tray I mentioned earlier. Keeping the tray covered with a moisture dome in a nice warm location (even just a higher shelf in a room), will help get all of your wheat berries sprouting at the same time so that you can enjoy a fine, healthy looking, even crop in the end.
In summary, to get the BEST end-product, follow the 10-step process I outlined at the outset of this article. If you have to cut corners, at least soak your seeds for the allotted time and then just let them do their sprouting in the soil. As for not soaking the wheat berries at all or only soaking them for a short time, you’re taking a chance. If you happen to oversoak, START OVER.
As a final note, I highly recommend growing in trays with humidity domes. Humidity domes are cheap, they clean up easily, and they do a great job of helping your wheat berries sprout and grow evenly. Sometimes even a slight draft in the early stages of your wheatgrass development can affect the uniformity of the tray. Many articles and books recommend sprouting your young grass under cover in a dark location, but I have sprouted my wheat berries under the bright clear cover of humidity domes, and the grass not only grows well but greens up as soon as it is able. This is especially desired when using low grass for floral arrangements. When I used to sprout under dark tarps, I would run into the problem of sometimes not making the deadline to uncover my sprouts, and then I’d end up with yellow tinted grass that just never greened up fully.
So, now that you pretty much know all my secrets for growing a high-quality grass, good luck on growing your own wheatgrass, and please feel free to post any questions. That's what I'm here for.
Stop back again next week for some yummy wheatgrass recipes.




 Posts
Posts