Friday, November 20, 2009

Young Living in Your Wheatgrass Operation

by Ellen McGlynn

Dear readers, I wanted to give a plug to an organization that was introduced to me several years ago and whose products were of such high quality and so personally effective, I began to incorporate them into my business operating procedures. That company is Young Living, maker of high-quality essential oils and aromatherapy products. In particular, I was blown away by Young Living’s Thieves line of products, which has grown substantially in just a few short years because of its popularity—no doubt because of its EFFECTIVENESS.

The Young Living Thieves blend is an organic mix of clove, cinnamon bark, lemon, eucalyptus, and rosemary that provides enormous anti-viral and anti-bacterial protection. It is also shown to eliminate mold growth. Wheatgrass Growers…you know what I’m talking about! I run the Young Living diffuser in my growing room and even created a power wash system for cleaning my growing trays using an inline fertilizer system containing Thieves Household Cleaner. I use the spray and wipes for cleaning tabletop surfaces, and I keep the foaming soap next to my sinks.

Over the years, I have dabbled with creating my own "Thieves" blend using other less-expensive oils, but there is just no substitute for what Young Living has to offer. The minute you smell their products, you know you are getting the highest quality botanicals you can find. And the proof is in the pudding. Thieves has become the #1 choice of environmentally-safe herbal cleaning and medicinal product in my home and business for years now because it WORKS.

Because I rely so heavily on Thieves, it only made sense to sign on as a distributor of Young Living products to receive the 24% product discount for my business. You may also want to consider doing the same for yours. Visit my Young Living Distributor website at www.youngliving.org/emcglynn and try Thieves for yourself! For future reference, you can find my Young Living link easily in the Favorite Links section of The Wheatgrass Grower sidebar. To order products from Young Living, you will need to provide a referring distributor number. Ours here is 885987, and I would love to be your sponsor. I would also love to hear your experiences using Thieves products!

Thursday, November 19, 2009

Planting Your Wheat Berries: To Sprout or Not to Sprout

by Ellen McGlynn

With your soil all in check now and your HARD RED WINTER WHEAT BERRIES ready to go (you can order them online through our website or find them in your local health food store), there are just a few more simple rules to follow before you start growing your own wheatgrass. While these rules are pretty standard for any wheatgrass growing “how-to,” I do want to elaborate on some of the timing requirements involved in getting your wheat berries from bag to tray. If you start growing wheatgrass with any regular frequency, you’re going to find that sometimes it’s not as easy as it sounds to meet those little 8-12 hour “deadlines,” and it’s nice to know what to expect when you either CAN’T or DON’T meet them.

Guidelines for a successful crop:
1. Measure 1½ cups of wheat berries in a one-quart sprouting jar (sprouting lids are available through our website, or you can use cheesecloth under a threaded ring on a canning jar).

2. Place sprouting lid on your jar before adding water so that the berries won’t spill out as you fill the jar.

3. Fill jar almost completely with water and shake well (with hand over lid) to give those berries a good rinse. Drain, and then fill the jar again right to the top.

4. Let the wheat berries soak for 8 to 12 hours.

5. After 8 to 12 hours, drain your soaked seeds, and fill the jar again with clean water to rinse. I have a high-pressure sink attachment that allows me to really agitate those plump soaked wheat berries and irrigate them well with clean water, so if you have a good hose attachment on your sink, you may find it a real plus when it comes to rinsing seeds at this stage.

6. Drain jar of all water and set in a dark, warm location (at least room temperature) to sprout. If you’re just doing one jar, simply set your jar in a draining position in a large bowl that will keep the jar inclined. Cover the bowl with a towel or plastic sheet so that the seeds do not dry out. If using plastic, do not cover the bowl so tightly that air cannot get in.

7. After 8 -12 hours of sprouting, little white tails will begin to protrude from the berries. Sprinkle your sprouted wheat berries in an even layer on top of (NOT mixed into) approximately 1 inch of soil (roughly two quarts) in your 10” x 20” tray. (See last week's posting on soil amendments).

8. Gently water tray to give it a good initial soak, top with a humidity dome, and then set in a 70-75 degree location out of direct sunlight. If you are also able to manage your room humidity, 40 to 60 percent humidity is the acceptable range.

9. Water your wheat sprouts once daily (preferably in the morning), and you should have a full-grown 9” grass ready to harvest in nine days from the time you first put water to wheat berry.

10. Wheatgrass is most nutritious on Days 9 and 10, so harvest it all at once about 1” from the root, and store it in a bag with a small hole for “breathing” in the crisper bin of your refrigerator. One tray should produce approximately one pound of cut grass. Use as needed. Cut grass should last for one to two weeks in the refrigerator if stored properly.
Now, back to the growing. What happens if you don’t have time to soak your wheat berries, or what if you lose track of time and end up soaking your wheat berries for more than 12 hours? What if you have time to soak your wheat berries, but you don’t have time to sprout them? All good questions. I’ve been forced to “handle the consequences” myself many times and know where it’s okay to cut corners, and where it is not.


First of all, let me state that it’s entirely possible to grow wheatgrass without soaking the wheat berries at all (if you water them well, keep them misted several times a day, and covered), BUT I must make you aware that there are different microclimates even within a single tray, and because of that, not all wheat berries  will sprout at exactly the same time. In particular, the ones on the edges of the tray will tend to sprout later and will be affected by cooler temperatures more than the ones in the middle, resulting in delayed or retarded growth. Likewise, not all wheat berries are created equal, and some require just a tad bit of extra soaking time to get them into the sprouting stage.  Some wheat berries may not even sprout at all for any number of reasons. Unsprouted wheat berries in moist locations can cause seriously moldy conditions. So, while it is possible to throw dry wheat berrries on the soil and come up with a half-decent crop, you may ultimately not get the best looking end-product.

Next, what if you don’t have time to soak your wheat berries even for 8 hours? Soak it as for as long as you can. Anything is better than not soaking at all. Then either go directly to applying your wheat berries to a nice moist soil, or keep them in the jar for sprouting if time permits. Be forewarned, however, that you will probably have a slightly uneven crop resulting in lower crop yield or an unsightly presentation.

What if you oversoak your wheat berries? DANGER ZONE. Try, try, TRY not to go over the 12-hour mark. Fourteen, tops! The smell of fermentation is the first sign that you’ve oversoaked your wheat berries and are not going to have a good crop. What you’ll get is a little germination and a LOT of mold, so save yourself the time and soil right from the start and consider it a lost crop. [Below top:   Top view of mold developing on oversoaked wheat berries on Day 4; Below bottom:  Top view of healthy grass planted on same day].


Can you just soak but not sprout your wheat berries in the jar? Yes. And you will still get a nice crop. BUT, keep in mind those little microclimates in the tray I mentioned earlier. Keeping the tray covered with a moisture dome in a nice warm location (even just a higher shelf in a room), will help get all of your wheat berries sprouting at the same time so that you can enjoy a fine, healthy looking, even crop in the end.

In summary, to get the BEST end-product, follow the 10-step process I outlined at the outset of this article. If you have to cut corners, at least soak your seeds for the allotted time and then just let them do their sprouting in the soil. As for not soaking the wheat berries at all or only soaking them for a short time, you’re taking a chance. If you happen to oversoak, START OVER.

As a final note, I highly recommend growing in trays with humidity domes. Humidity domes are cheap, they clean up easily, and they do a great job of helping your wheat berries sprout and grow evenly. Sometimes even a slight draft in the early stages of your wheatgrass development can affect the uniformity of the tray.  Many articles and books recommend sprouting your young grass under cover in a dark location, but I have sprouted my wheat berries under the bright clear cover of humidity domes, and the grass not only grows well but greens up as soon as it is able. This is especially desired when using low grass for floral arrangements. When I used to sprout under dark tarps, I would run into the problem of sometimes not making the deadline to uncover my sprouts, and then I’d end up with yellow tinted grass that just never greened up fully.

So, now that you pretty much know all my secrets for growing a high-quality grass, good luck on growing your own wheatgrass, and please feel free to post any questions. That's what I'm here for.

Stop back again next week for some yummy wheatgrass recipes.

Thursday, November 12, 2009

Simple Soil Chemistry and Organic Amendments for your Wheatgrass Crop

by Ellen McGlynn

So you've selected a soil that looks pretty good and now you want to get soaking those wheat berries and growing that wheatgrass. Right? Stop! Chances are, your wheat berries will sprout and grow acceptably well in the soil you've chosen if you've followed the guidelines in my previous post, but it's always a good idea to test your soil first for basic nutrients in order to optimize your wheatgrass' growing and nutritional potential. (Organic soil amendments pictured far left to right: volcanic ash, bone meal, dried blood, lime).

As I’ve mentioned before, when purchasing your soil, make the effort to buy all of your bagged soil from the same pallet. This logic extends now to the second phase of the testing process, where you will want to test for macronutrients only once with a genuine soil testing kit and be pretty sure that the same test results can be applied to all of the soil in your new stock.

Now, with so many basic soil testing kits on the market, which one should you choose? If you recall back in one of my earlier posts, I waxed on about a certain EPA issue in my back yard. Well, I used my time well with those folks and had a nice chat about what they considered to be a good quality soil testing kit for my growing ambitions. Their recommendation was La Motte. La Motte kits are more expensive than the Rapitests you’re likely to find at your local garden center, but an impressive little soil testing kit from La Motte can still be had for under $70 online. I bought mine from the Biocontrol Network website. Complete with two highly informational soil manuals and a companion CD, this little recipe box full of test tubes and solutions to measure your soil’s pH and macronutrients is a must for any serious gardener's greenhouse.

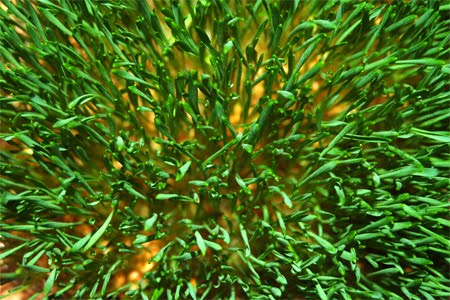
Starting with the pH, a measurement of your soil’s acidity or alkalinity, you will want to make sure that your wheatgrass soil measures on the slightly acid side. Every plant has its optimal growing pH, and wheat’s optimal pH is between 6.0 and 7.0. I once had a client who followed a strictly alkaline diet and was very reactive to even slightly-acidic foods. She was not too pleased to learn that I grew my wheatgrass in a slightly acid soil despite my justifications for doing so. I lost the customer, but my position on soil acidity still stands strong. Wheatgrass grows best in a slightly acid soil measuring around 6.5. I know this from growing thousands of wheatgrass trays. Without a proper soil pH, even the most nutritious soil will not live up to its full potential. This slight acidity is necessary for the grass to assimilate not only the macronutrients in the soil--the potassium, phosphorous, and nitrogen--but also the micronutrients such as iron and zinc. If your soil is too alkaline at 7.0 or greater, you will want to add peat moss to lower the pH. If your soil is too acid, measuring below 6.0, you will want to add pulverized lime to help “sweeten” it. Lime is typically a slow-acting soil amendment, so the more highly pulverized, the more fast-acting it will be, which is what you want since tray-grown wheatgrass only has about nine days of soil contact. One level teaspoon per 10” x 20” tray should be sufficient.

Next on the importance scale is Nitrogen. Nitrogen is responsible for wheatgrass’ notoriously green color. My favorite choice for greening has always been to mix my deficient soil with one part bagged composted manure—NOT fresh manure. Adding fresh manure will “burn” your grass, and it's just not an acceptable practice to add fresh manure to low-lying edible crops in the same growing season. For nitrogen-deficient soil, you may alternately want to consider adding a level teaspoon of dried blood per tray or, if the thought of adding dried beef and pork blood to your wheatgrass turns your stomach (as it does mine), a teaspoon of alfalfa meal. Suffice it to say, simply substituting composted manure for one-fourth of my regular soil mix has always provided an ample nitrogen fix.

Next we move on to Phosphorous. Phosphorous promotes strong root growth in your wheatgrass and helps it grow quickly and with vigor, ultimately resulting in good crop yield in a reliable time. Two words: bone meal. If your soil is deficient in phosphorous, add just a teaspoon per tray to help make the correction.

Potassium. This macronutrient actually has a lot to do with how your wheatgrass tastes. A nice sweet wheatgrass is probably rich in potassium. While potassium is not the only contributing factor toward a wheatgrass crop’s sweetness, it is a major player, so keep your soil levels in check. It’s hard enough to drink wheatgrass juice, let alone bitter wheatgrass juice. Potassium is also responsible for maintaining water pressure within a plant, making for a more plump, strong grass. This is especially important as your crop nears its harvest. Trust me, when you are responsible for harvesting dozens of trays in a single day, you notice how convenient it is to have a crop that isn’t keeling over.

Now, while that is basically it for the major players, I must confess to also giving my wheatgrass a boost in the micronutrient department by adding a teaspoon of volcanic ash per tray. I’ve been lucky enough to find a fairly local bulk supplier, and I happily make that 60-mile pilgrimage to Vestal, New York, every year to stock up on what, to me, has become my own wheatgrass recipe's not-so-secret secret ingredient. I cannot state exactly what volcanic ash does for my grass since I do not have the sort of soil testing capabilities I need to manage that process, though I can say that volcanic ash is known to impart a whole host of micronutrients and trace minerals to soil, and the look of my grass has improved since incorporating it into my soil recipe. While the product I use is not available for retail sale, you may wish to use a volcanic ash product called Azomite to add trace minerals to your soil.

Keep in mind that the organic amendments I’ve mentioned in this article, aside from the volcanic ash, are perhaps the most easily-found organic amendments in your local garden center or hardware store, but there are also many more options out there that can be easily found online at any number of organic gardening websites-- items such as bat guano and fish/sea fertilizers. There are many ways to attack your fertilizing situation organically, and I haven’t even touched on composting yet, so if you have the time to experiment, I highly recommend it. Some organic fertilizers are fast-acting while others may take a whole outdoor growing season (or even years!) to realize maximum soil benefits. Sometimes the amendments I choose only impart modest benefits to my immediate wheatgrass crop but provide tremendous long-term benefits to my overall outdoor compost. You be the judge as to what you are comfortable using and what your ultimate goals are. I have often considered “making soil” to be like making a cake; therefore, I tend only to use ingredients I am mentally comfortable with. I’m not comfortable with the idea of using bat guano. Yet.

Monday, November 2, 2009

5 Rules for High-Quality Soil

by Ellen McGlynn

This is not going to be a lesson in composting (though that WILL be a topic in future postings) but rather a lesson in selecting high-quality packaged soil at a reasonable price to get you off the ground and running pretty quickly with your new wheatgrass growing venture.

Over my years of growing wheatgrass as a business, I have relied heavily on bagged soil for several reasons: 1) I initially did not have the amount of composted soil I needed to produce the amount of grass I was growing; 2) it was a convenient way for me to store and move soil from place to place as needed; and 3) it provided a practical solution to storing soil indoors during the frozen winter months.

When I first began growing wheatgrass for my own family, I would go to my nearest Lowe's or Home Depot and select their cheapest top soils. Sometimes the products were very clean (meaning free of debris); at other times, the very same packaged products were flat out disturbing. It became a bit of a roller coaster ride. I’d find bottle caps and glass fragments or even shredded plastic gloves. Sometimes the soils would be riddled with large stones (over a half-inch in diameter) or contain too many oversized sticks. Sometimes the anemic look of a soil alone was enough to tell me that it was not in good health. Visibly poor soil quality turned up in lower-end products about 50% of the time. Ultimately I decided it was just too hit-and-miss and not worth the upfront savings (and God only knows what those plastic gloves were used for!). The funny thing is that it had never occurred to me to rip open a bag—even an already damaged bag—and look at the soil before buying 10 more bags. That would have been too much like sampling a grape at the produce counter before buying the whole bunch. Right or wrong, it just doesn’t make sense NOT to!

It wasn’t until I began shopping around for my soil at smaller local hardware stores and talking to small business owners that I realized it was okay for me to sample the soil. Often, without my even asking, a seller would sense my concerns and rip open several bags for the sampling. I felt like a world-class chef scouring the souks of Northern Africa sampling mounds of spices to prepare exotic feasts. Over time, I developed a streamlined set of procedures for buying high-quality bagged soil.
1. PRODUCT LABELING. Examine the soil packaging carefully, and look for product labeling that specifically claims 100% organic content. Bottle caps, plastic gloves, and shards of glass are NOT acceptable and should not be found in bagged soil; therefore, do not even waste time sampling a bag that doesn’t claim to be 100% natural on the label.
2. COLOR. At very first sight, a soil’s color should appear dark and rich like coffee grounds. A soil that is rich in color is a soil that is rich in nutrients.
3. AROMA. Hold a handful of soil to your nose. Foul smelling soil means that it might still be composting and too “hot” for wheatgrass to grow optimally. A good soil should have a pleasant earthy aroma like the smell of spring air on a rainy day.
4. DEBRIS. Sift through a few handfuls of soil to check for synthetic and organic debris. Large stones (no more than ¼” diameter) and long sticks are not acceptable for the purpose of growing wheatgrass.

5. SOIL DENSITY. Soil should be light and crumbly when sifted through the fingers. A soil that does not break apart easily or is too fine-grained and compact should be an immediate indicator that soil amendments (such as mulch or peat moss) will be necessary to allow for soil aeration and promote healthy root growth. An easy way to check for soil density without even touching the soil is to look at how the bags stack together on a pallet. Bags that are unusually flat and uniform (like vacuum-packed coffee bricks) contain very dense soil. NOTE: Dense soil can trigger mold and promote root rot in your wheatgrass.

Once a bag of soil passes this first round of testing and you decide to buy several bags, be sure then that all of the bags you purchase come from the same pallet (usually there are 60 bags of soil per pallet). Soil does differ from shipment to shipment, and buying all of your bags from the same pallet will increase your chances of making a purchase consistent with the product you sampled.

Using these guidelines, there is no reason you should have to pay for expensive “designer label” top soil to grow a top-notch grass. Sometimes the cheapest bag of soil can turn out to be a diamond in the rough.
THE GROWER’S PICK: Jolly Gardener brand top soils (available only in the eastern and mid-western U.S.)
Always ask a store owner or department clerk before ripping open any salable product. If the store representative appears uncooperative, remind him that a larger sale is at stake and that he can always tape up the opening and put the product back on the shelf if you decide not to buy.

NEXT WEEK: Simple Soil Chemistry and Amendments


AgMap

Mountain Rose Herbs. A Herbs, Health & Harmony Com